Getting started with Azure Static Web Apps
June 30, 2020
Introduction #
In the last article, I talked about how to deploy a Hugo static site to Azure storage and CDN using GitHub Actions. Setting up that pipeline however had many steps, and could perhaps be considered a bit abstruse.
With the advent of the new Static Web App service, Microsoft has now significantly simplified the same solution. Within a few clicks on Azure Portal, your web app (in a GitHub repository) can be automatically configured for CI/CD via GitHub Actions and published to Azure. The impressive part of the process is that the included GitHub Actions workflow is configured with Microsoft Oryx - a build tool which automatically detects your project type and runs the suitable build command(s). You can have your React, Vue, Angular, Hugo and Gatsby projects etc. built automatically with little to no added build configs.
The Azure Static Web App service supports caching by default, distributing your site’s assets to your users’ geographic location for faster loading times. Additional features include Integrated API support via Azure Functions, custom domain name and authentication support. You can find the list of supported features here.
Prerequisites #
To get started:
- You’ll need an Azure subscription. You can setup a Trial Account.
- A static web app in a repository on GitHub. You can fork/clone this sample Hugo project.
Steps #
You can create a Static Web App via the Azure Portal or Azure CLI in Azure Cloud Shell / your local development machine. We’ll go over the two methods starting with the portal.
Create a Static Web App using Azure Portal #
Go to Azure Portal.
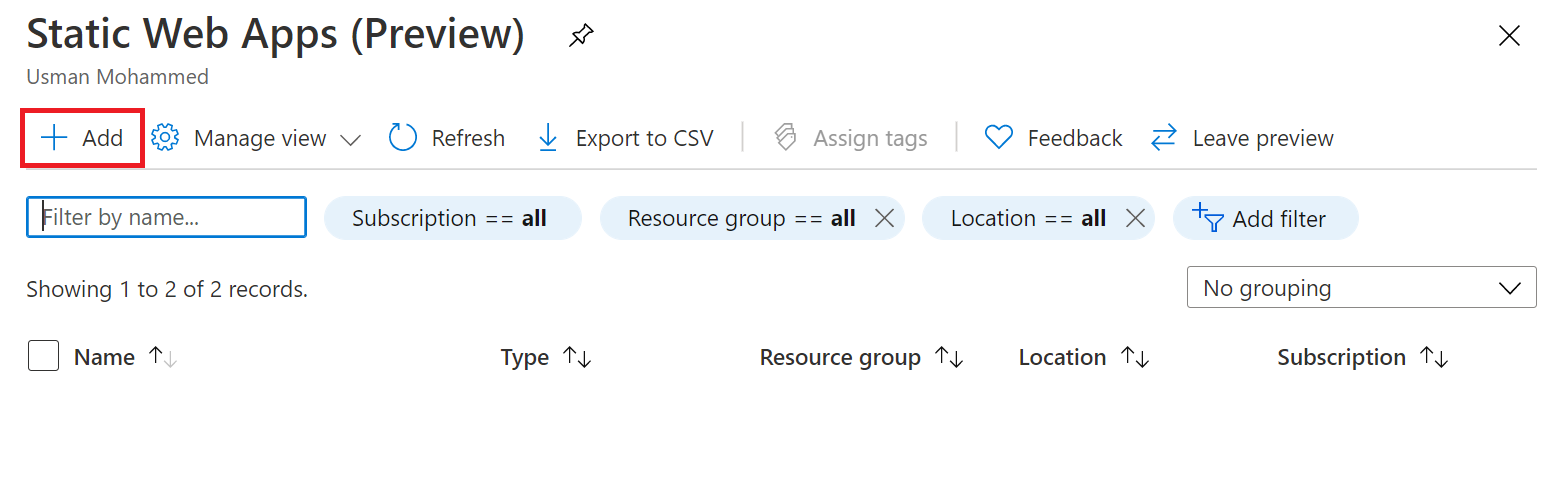
Navigate to Static Web Apps (Preview) and Click Add.
Select an existing Resource Group, or click Create new to create a new one.
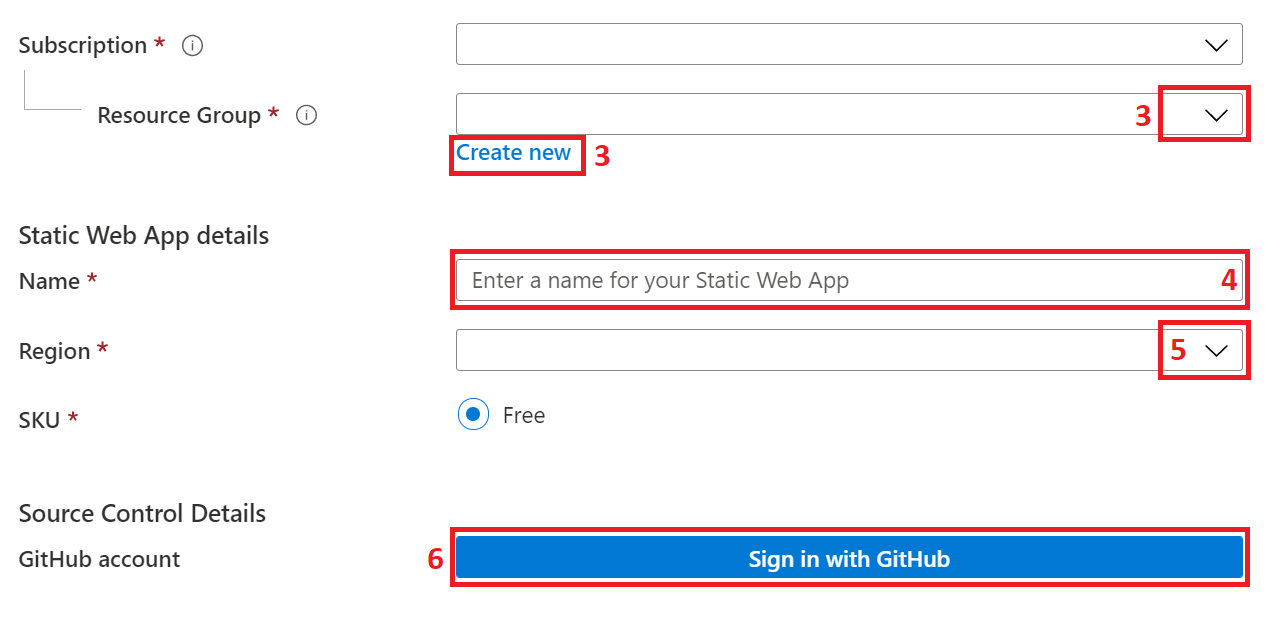
Provide a Name for your static web app.
Select the closest Region to you.
Only Free SKU is currently available, likely because the service is in preview.
Click Sign in with GitHub.
Select your Organization (sometimes the name of your GitHub account).
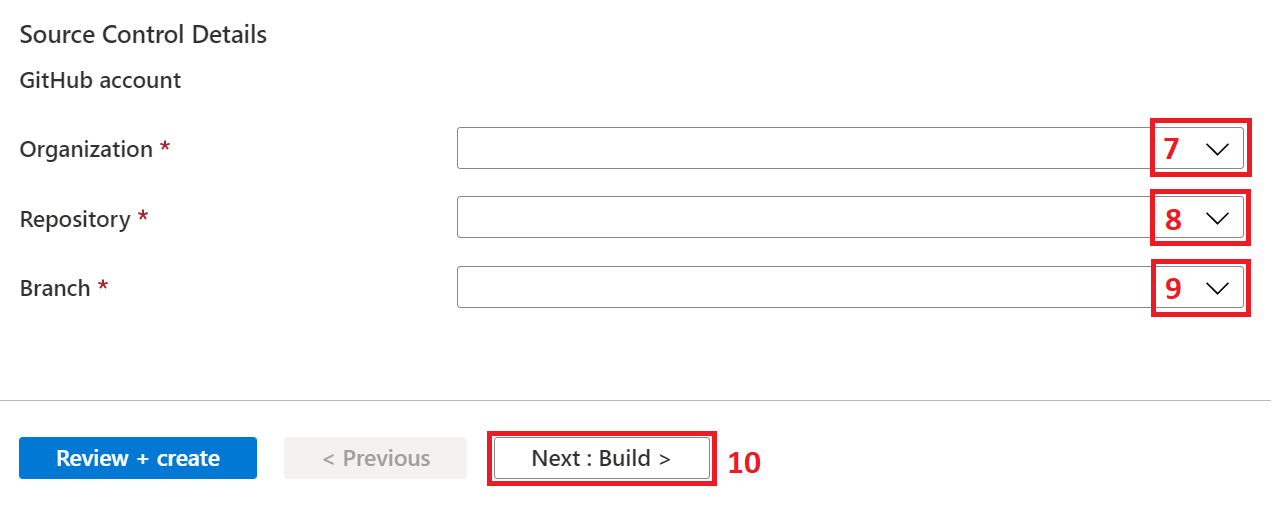
Select your Repository.
Select your main Branch (e.g.
master).Click Next : Build > to go to the Build tab.
Specify App location (this is the path of your application code).
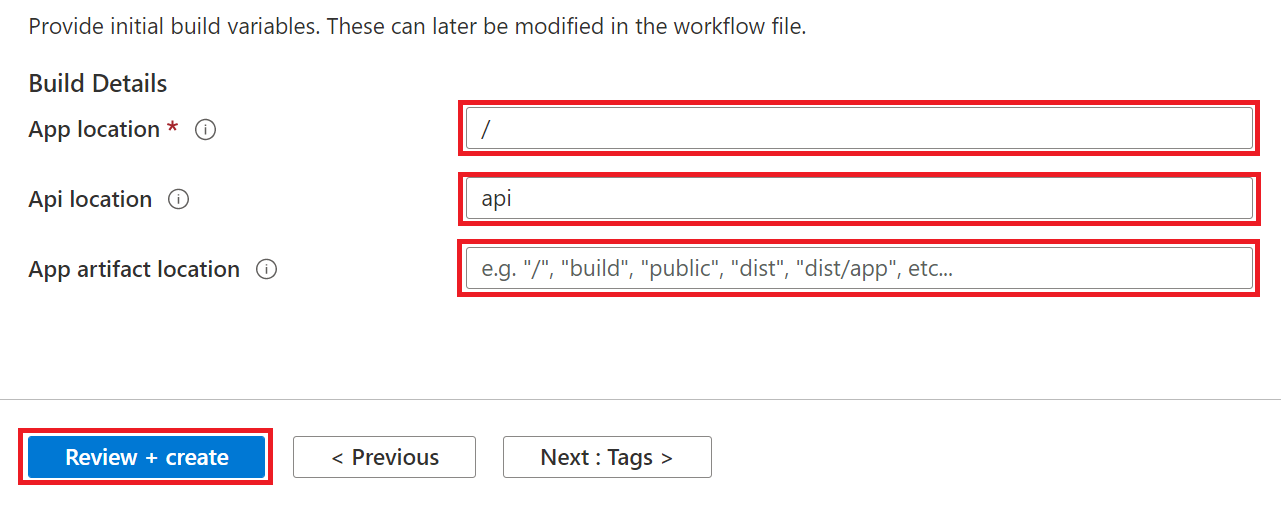
If you have an API (Azure Functions) in the repository, enter the path of the API for Api Location. Otherwise, leave the default
apivalue.Specify App artifact location (e.g
publicfor sample Hugo project).Click Review + Create.
Click Create.
Navigate back to Static Web Apps page and select your new web app.
It may take a few seconds for new apps to appear. Page may need to refreshed a few times.
Click Browse or the link under URL field to view the published web application.
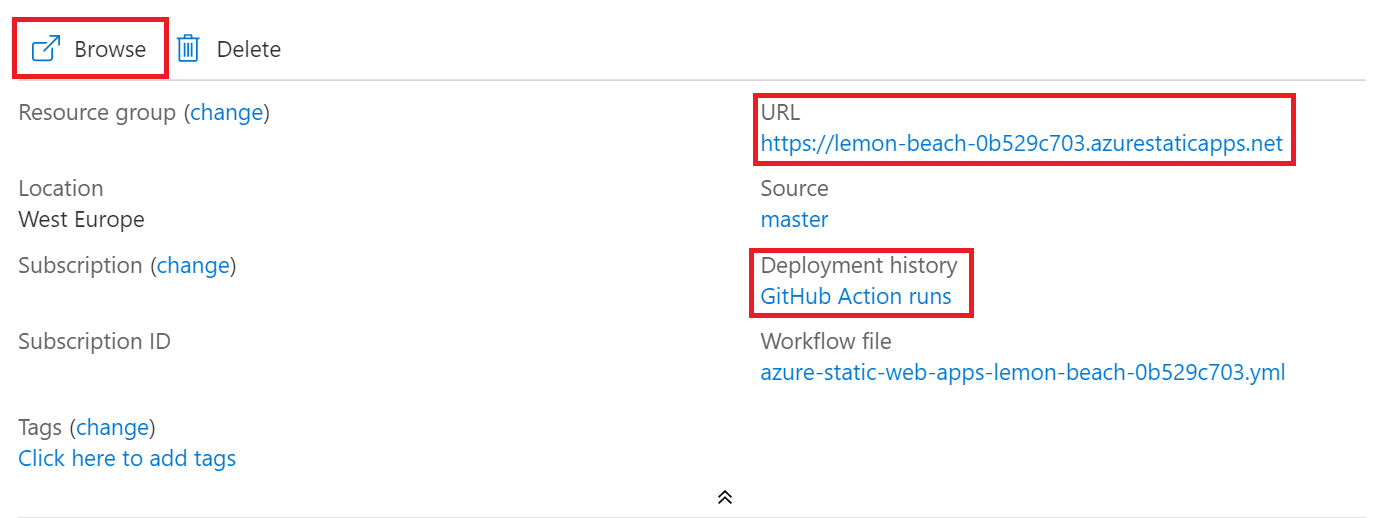
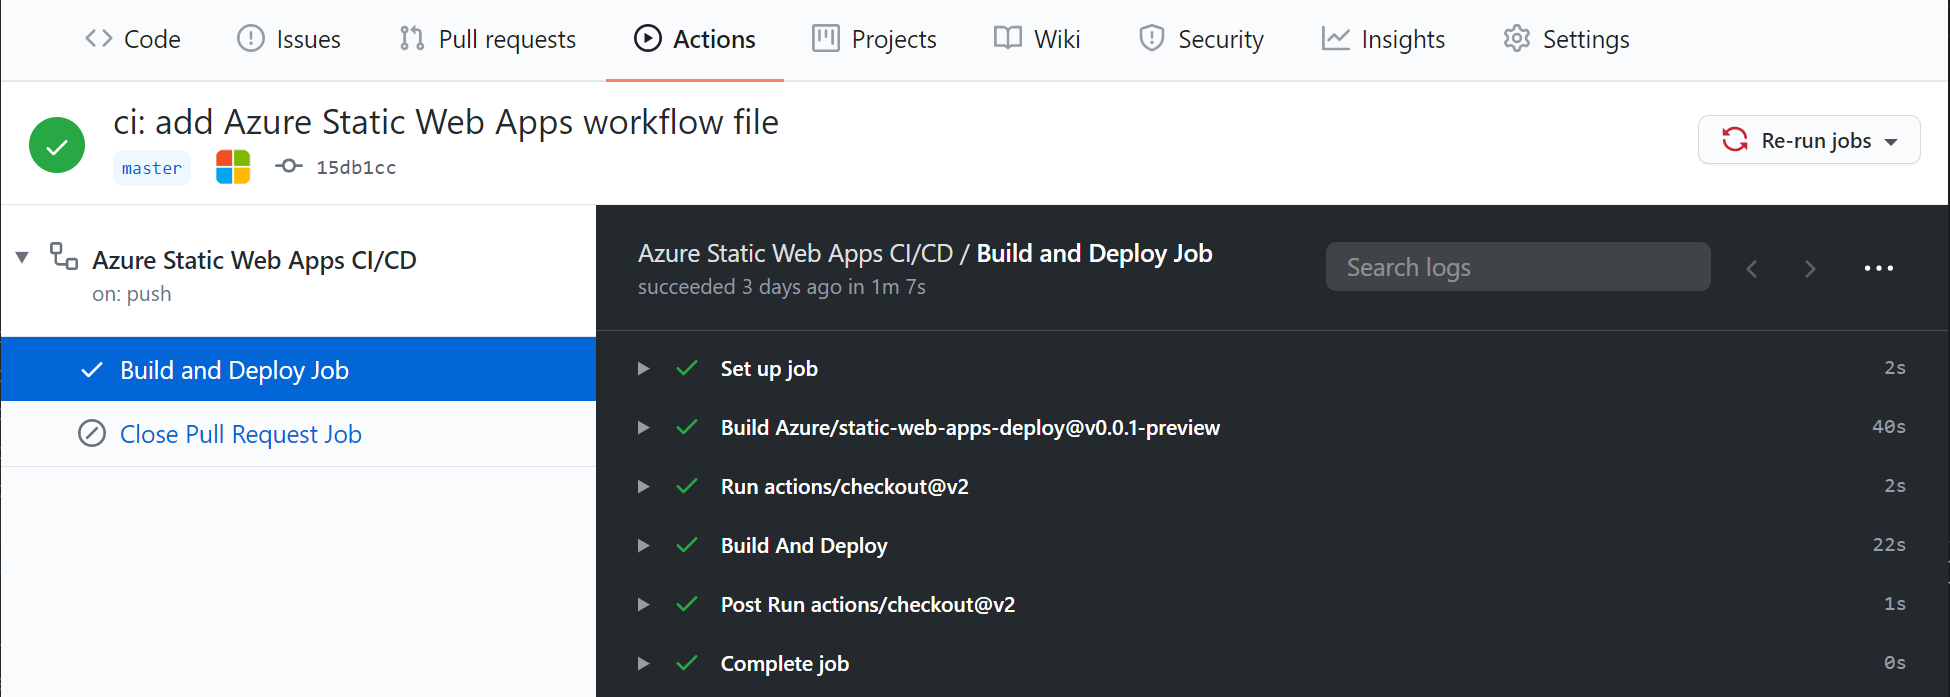
Also click on GitHub Action runs to view the build status. The link will take you to GitHub.
Fin.
Create a Static Web App using Azure CLI #
Before you start, you need to create a GitHub Personal Access Token.
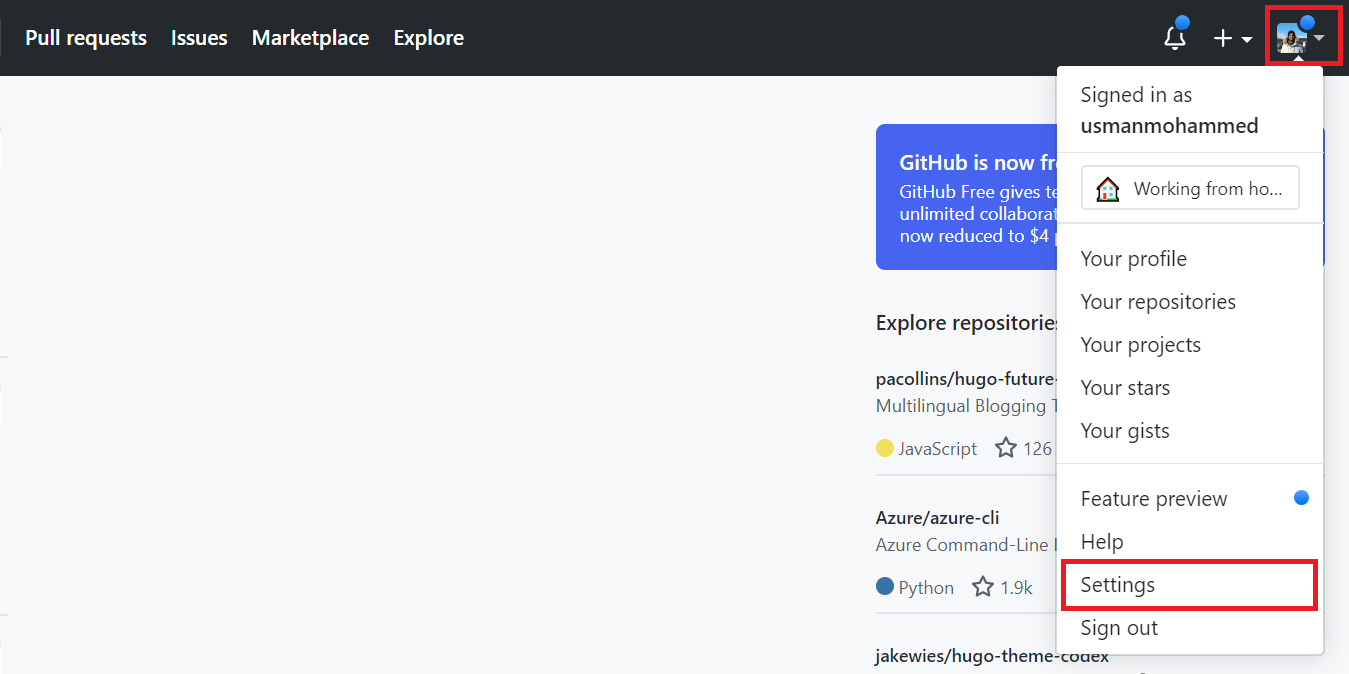
Open GitHub, and go to Settings.
Navigate to Developer settings > Personal access tokens > Generate new token.
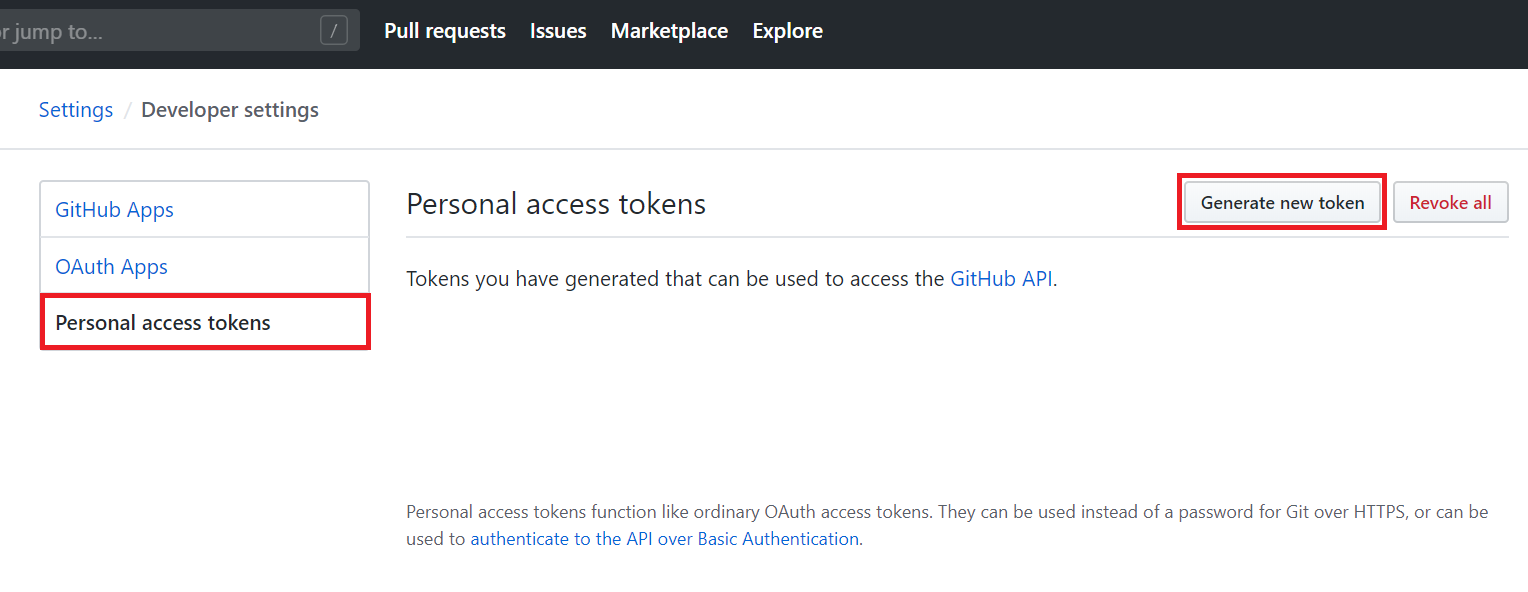
Complete the Note field, tick/check the
repoandworkflowoptions.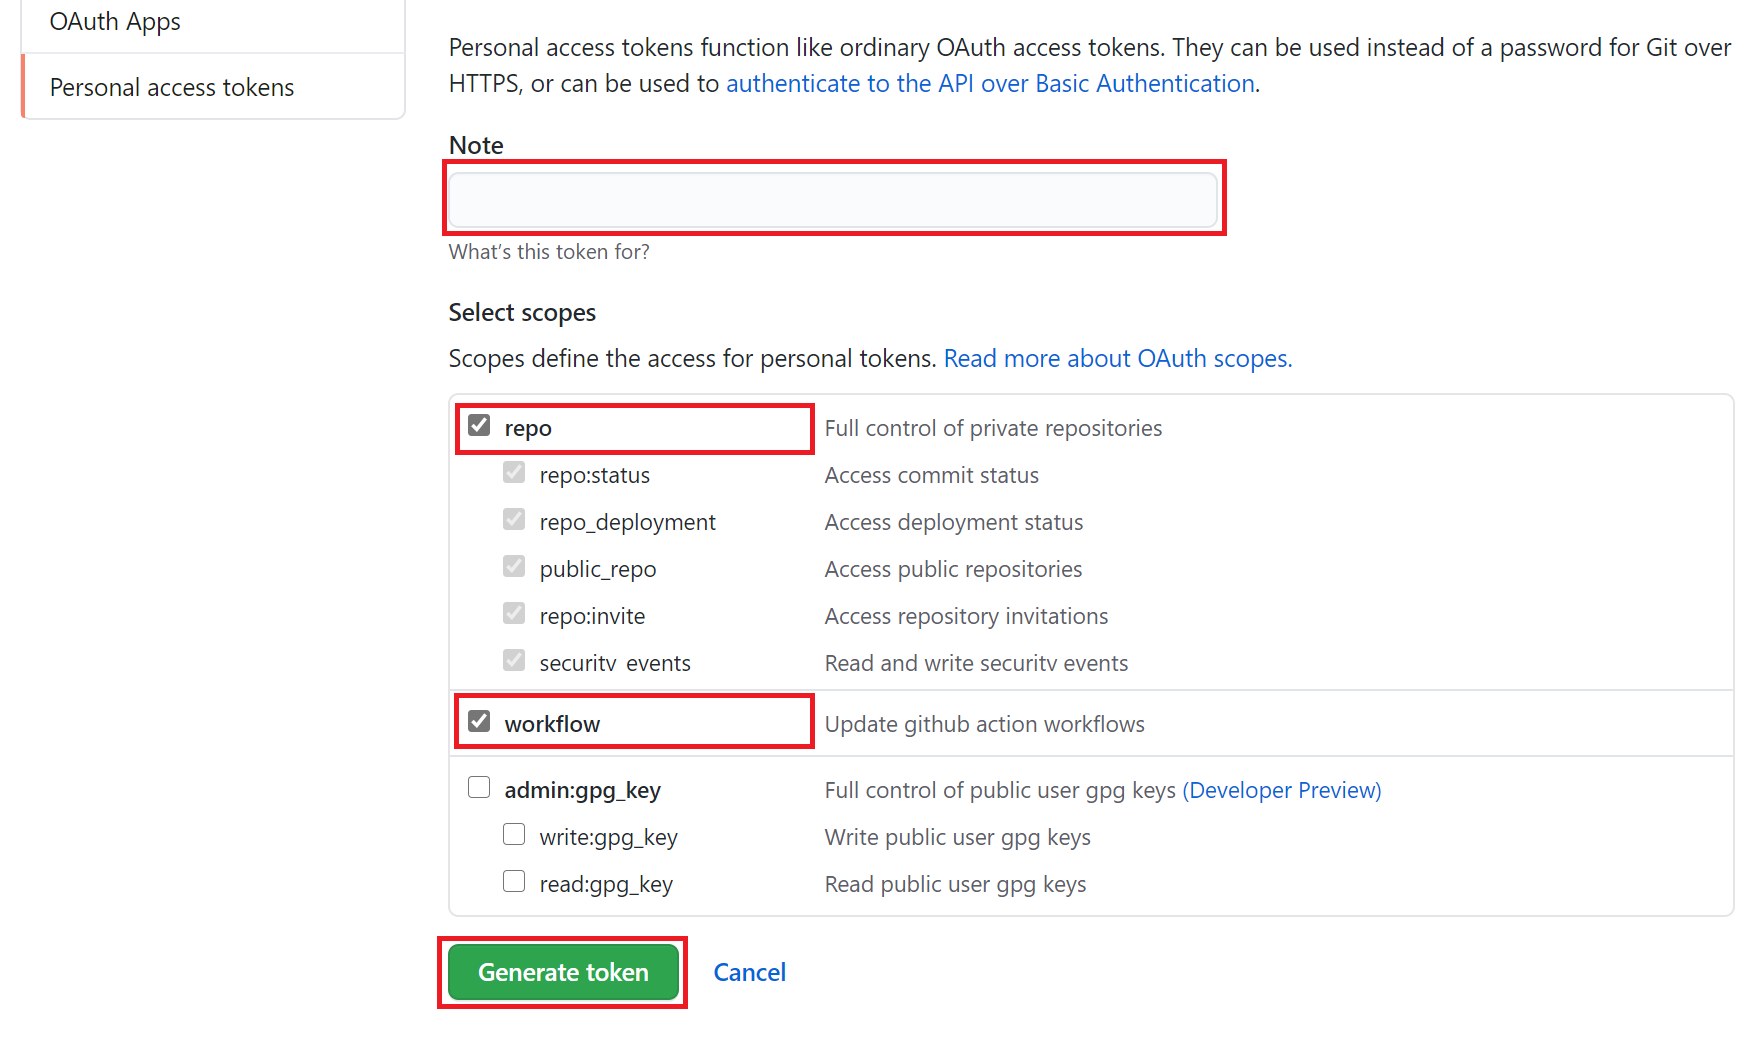
Click Generate token.
It is important to apply the Principle of Least Privilege when creating tokens and access credentials. Only select the roles/permissions needed for a task.
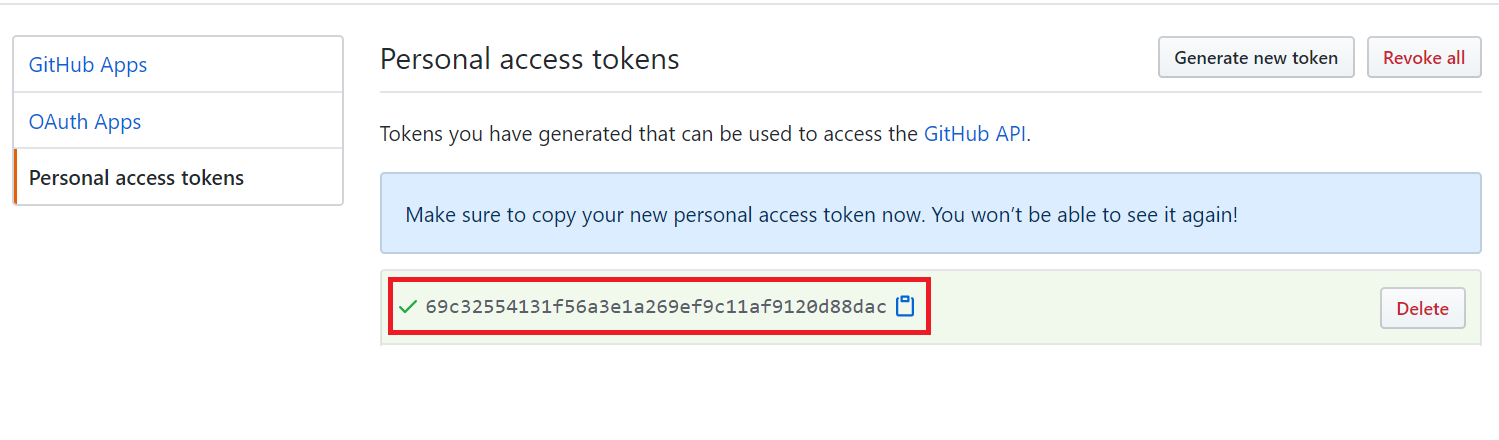
Copy the generated token.
With the token now provisioned, you can proceed to execute the CLI commands.
Navigate Azure Cloud Shell or install Azure CLI on your local development machine.
Login to your Azure account if you haven’t yet. This step is not required when using Azure Cloud Shell because you’ll be automatically authenticated on Azure Portal.
az loginCreate new Resource Group. Skip this step if you want to deploy to an existing resource group.
az group create -l <region> -n <resource-group>Where:
Argument Details <region>Deployment region (e.g. WestEurope,WestUS,WestUS2).<resource-group>The name of your new resource group. Run this command to create a new Static Web App:
az staticwebapp create -n <static-app-name> -g <resource-group> -s <github-repository-url> -l <region> -b <branch> --app-artifact-location <artifact-location> --app-location <app-location> --api-location <api-location> --token <token>Where:
Argument Details <static-app-name>Name of your new static web app. <resource-group>Your resource group name. <github-repository-url>URL of your project on GitHub
(e.g.https://github.com/usmanmohammed/hugo-quickstart).<region>Deployment region (e.g. WestEurope,WestUS,WestUS2).<branch>Name of your main branch (e.g. master).<artifact-location>Path of your app artifacts (eg. publicfor a Hugo project).
The full list of paths can be found here.<app-location>Path of your application code. Default is '/'.<api-location>Path of your API if exists in repository. Default value is api.<token>Your GitHub personal access token. The result of the command when executed should be similar to this:
Command group 'staticwebapp' is in preview. It may be changed/removed in a future release.
{
  "branch": "master",
  "buildProperties": null,
  "customDomains": [],
  "defaultHostname": "calm-smoke-03f632e03.azurestaticapps.net",
  "id": "<id>",
  "kind": null,
  "location": "West Europe",
  "name": "<static-app-name>",
  "repositoryToken": null,
  "repositoryUrl": "https://github.com/usmanmohammed/hugo-quickstart",
  "resourceGroup": "<resource-group>",
  "sku": {
    "capabilities": null,
    "capacity": null,
    "family": null,
    "locations": null,
    "name": "Free",
    "size": null,
    "skuCapacity": null,
    "tier": "Free"
  },
  "tags": null,
  "type": "Microsoft.Web/staticSites"
}
Copy the value of
defaultHostname(e.g.calm-smoke-03f632e03.azurestaticapps.net) and paste in your browser. This is the URL of your published app.You can also view the deployment status by continuing from Step 16 from the GUI method.
Fin.
Closing Remarks #
Developers have been asking for a simpler solution for deploying static web apps on Azure and this seems to be it. While there are limited features so far and still some bugs to be squashed (as of the time this article was published), it’s impressive to see how easy deploying static apps can be.
Azure Static Web App service has no paid pricing plan yet. It will be hard to imagine the service costing more than the cheapest configuration of a traditional Web app service. Perhaps Microsoft may let everyone to enjoy it for free post-preview.
More features are expected soon, and I’m really looking forward Application Insights integration. Let me know in the comments section below what features you’d love to see.